Pop-up how-to

Hi friends, here's a how-to on my pop-up cards. Last summer I decided on finding a card design that was sort of interactive, yet not too dimensional, to make for the Danish Operation write home.
For those who don't know, the Operation write home delivers cards for military personnel to send home to their loved ones while deployed.
~ My favorite things Mermazing, Elegant rectangle stax, Neat & Tangled Mermazing, Taylored Expressions Sweet scallop stencil

The pop-up card design is not my original idea. It's been around for years, and I recall making one a looong time ago, but it was tedious and I didn't like the working process. But I recently saw Jennifer Mcquire make it this way, and I knew I had to give it a try. And once I'd made one they just flowed on out of my crafty quarters. They are really easy to make and add quite the dimension to the card. AND - they fold flat, which is absolutely perfect.
~ Whimsy stamps Whale of a time, Sunny Studios stamps Sea you soon, My favorite things Hooray, Elegant rectangle stax, Taylored Expressions Splash stencil

Basically I cut the front panel wider than the card. Here I cut the panel 14,8 cm x 14,1 cm, then scoring at 0,6; 1,2 and 1,8 cm from each side.
My cards are typically in the Danish A6 size, but for US A2 I'd widen with 1.5 inch, scoring at each quarter (3 from each side).
I find that with the folds 0,5 cm is not enough and 1 cm is too much. The perfect dimension is 0,6-0,8 cm in my opinion.

Once scored you want to place the penel backside up, then make the first fold onto the back of the panel. And this is what that looks like.

Before cutting into the panel I decide for a layout to figure out the shape/size of my center die. Sometimes I cut first, sometimes I would create the front panel before cutting.
Once card base and pop-up panel are ready - including all stamped sentiments! - I add glue only to the 2 last folds of the panel and adhere the pop-up panel and place something heavy on it while it dries. Then I add the images including the "floating" image. I used acetate for these, but you can use clear packaging as well. And voilá!
~ Whimsy stamps Hap-bee birthday, Sunny Studio stamps Just bee-cause, Waffle Flower Nesting Hexagons
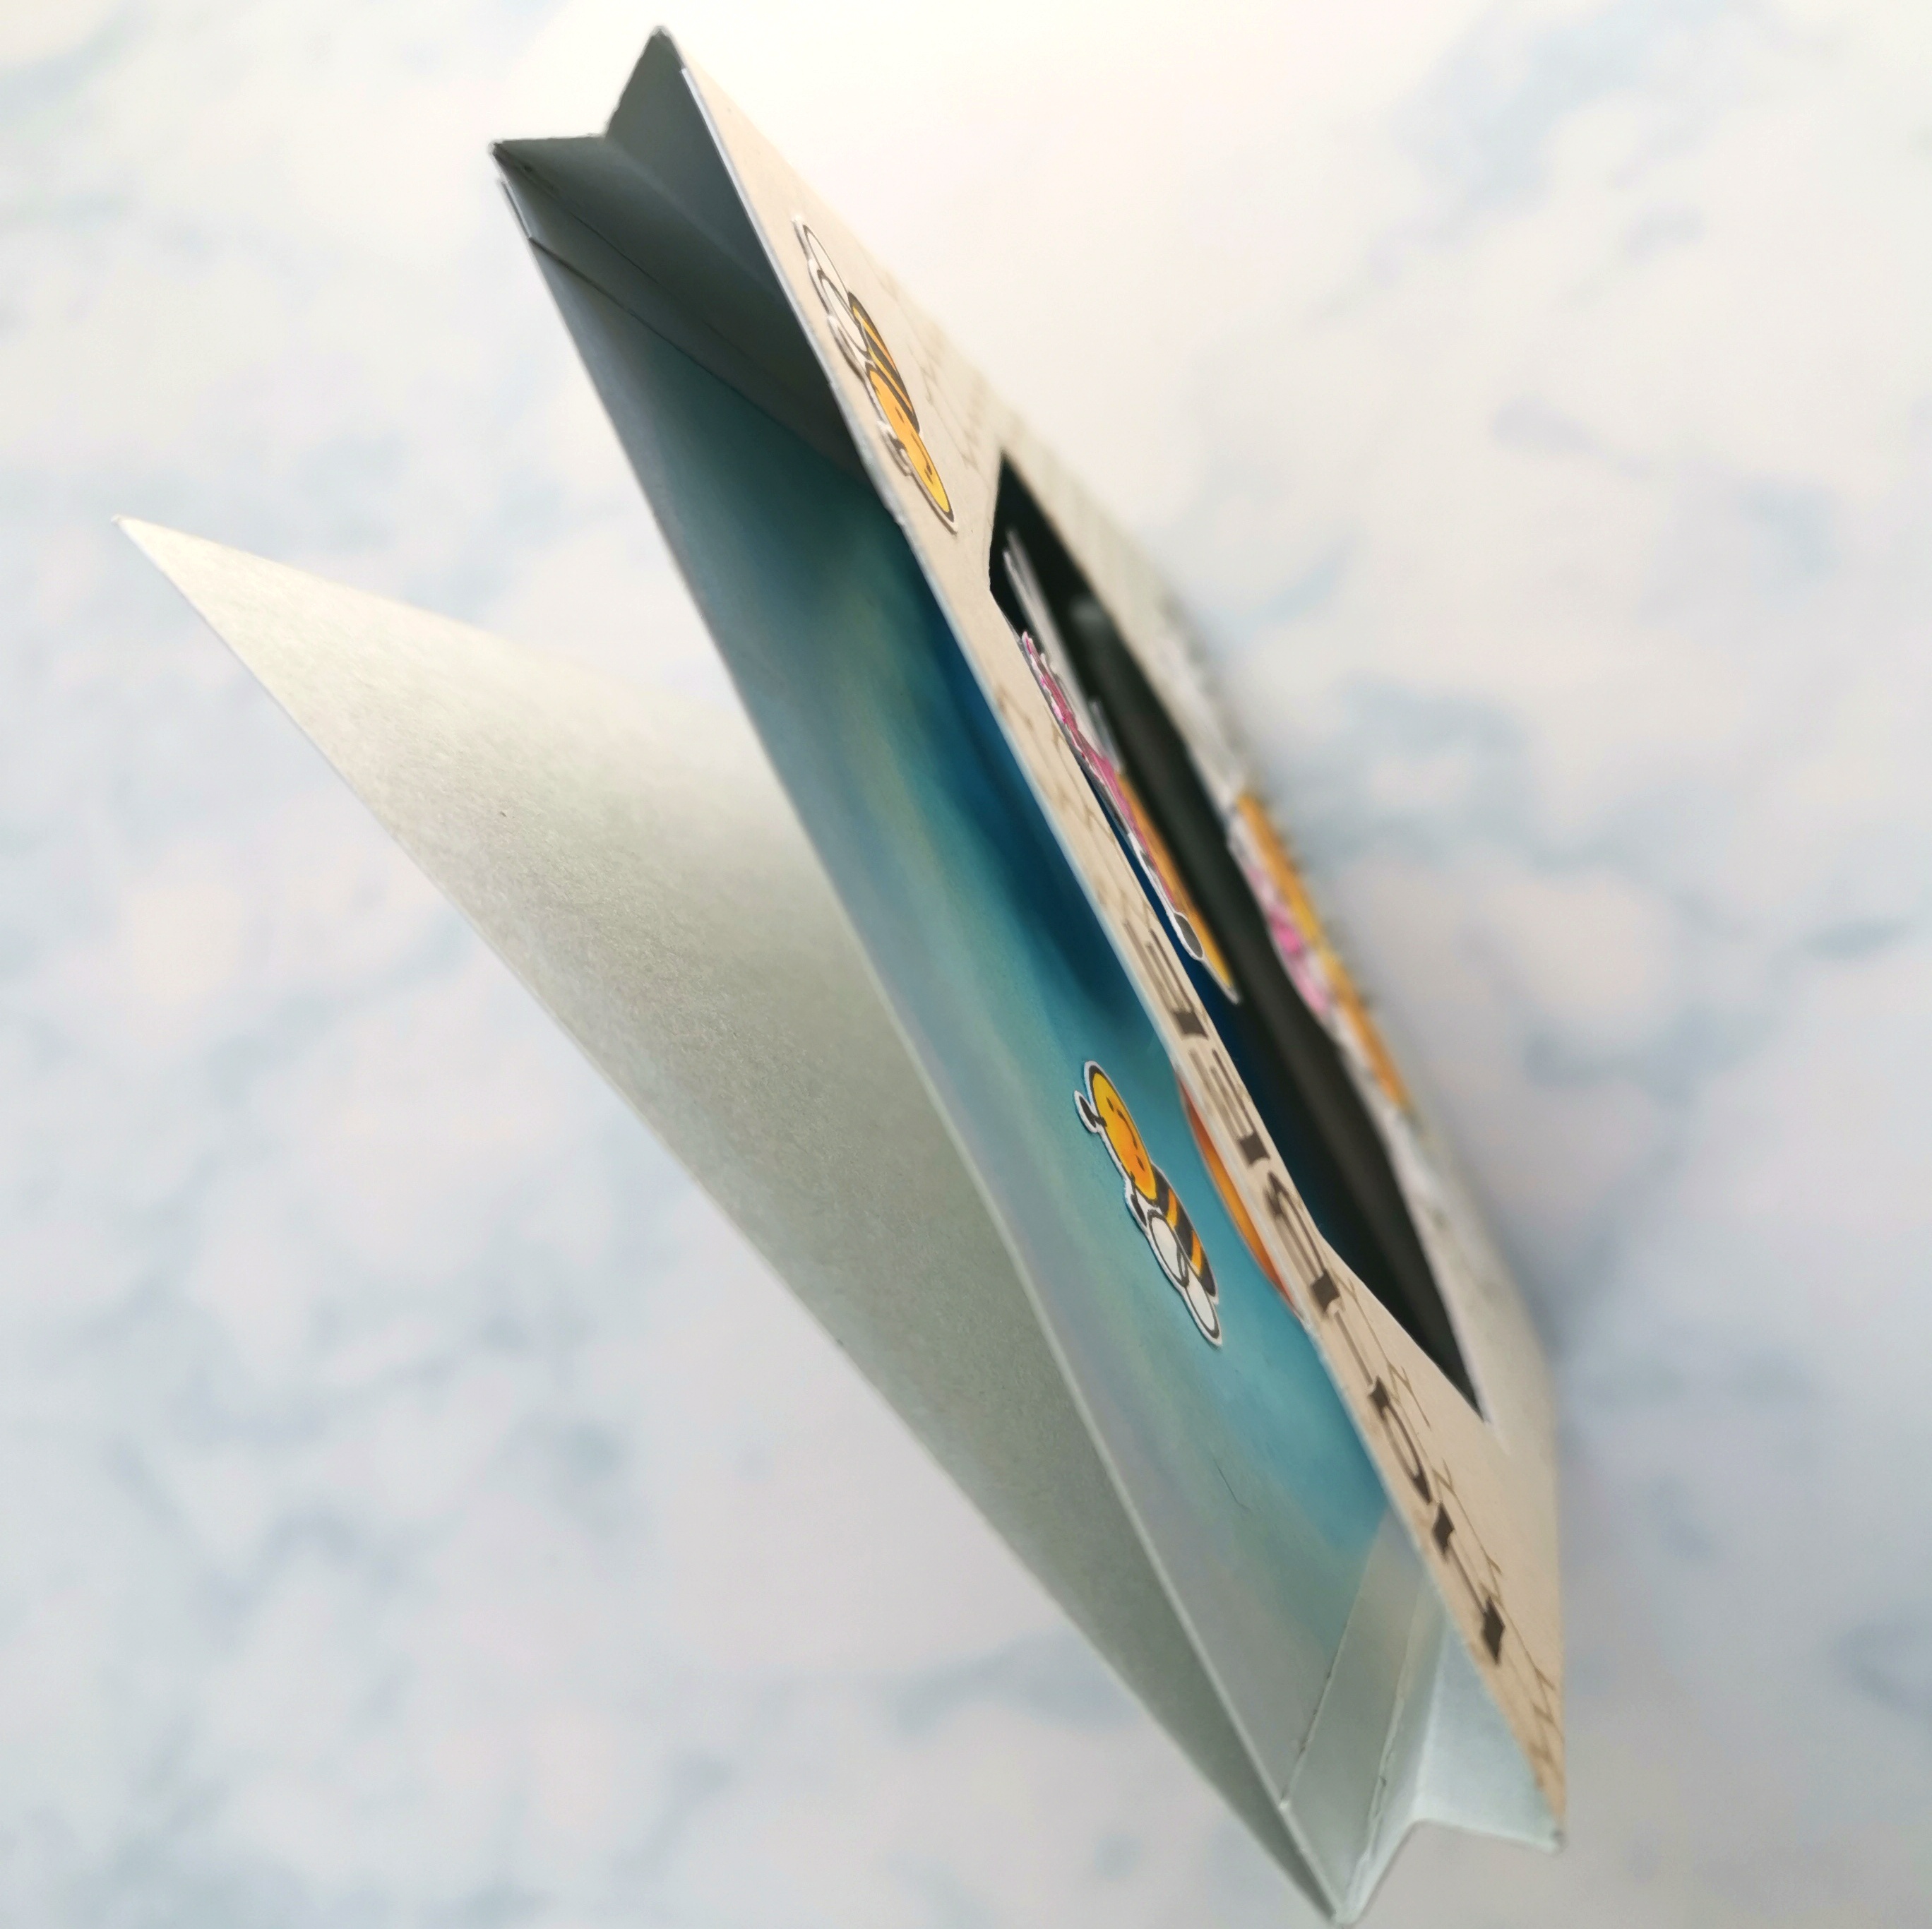
Here's a look from the top to give you a better idea of the W-fold that creates the pop-up.

And here's a closer look at some of my other creations.
This ninja card was one of the first ones I made. Rather simple looking, but still kicks a punch. And I honestly like the simple almost monochrome look.
~ My favorite things Ninja-mazing, Hooray

Here I stamped and ink blended the whole panel, then cut out the center, letting the background continue yet be dimensional. To fit it perfectly, I simply lay the top panel over the card base so they allign and then "inlay" the die cut panel.
Here I glued die cut images to the front and the inside. Btw I do not own a lot of coordinating dies, so most were fuzzy cut.
~ My favorite things Party animals, Elegant rectangle stax, Musical notes

For other cards I cut the center first for a different design inside and out. For this card I used the Concord & 9th rainbow turnabout for the front panel, and a cloud stencil for the inside. Obviously you want to ink blend BEFORE adhering the pop-up panel.
~ My favorite things Frindly unicorns, Rainbows and unicorns.
Now you're all set to create your own pop-up card!
I hope you like them all - which is your favorite?
Thanks for stopping by and happy crafting!
Tina x


AHA sådan at forstå - altså et almindeligt kort bagerst og foldedimseriet sat ovenpå til sidst. NU forstår jeg det. 1.000 tak for how-to herfra. ;)
SvarSlet