Opslag

Viser opslag fra maj, 2019

Birthday cards for her

Billede
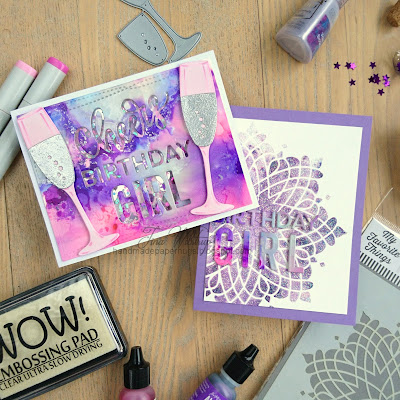
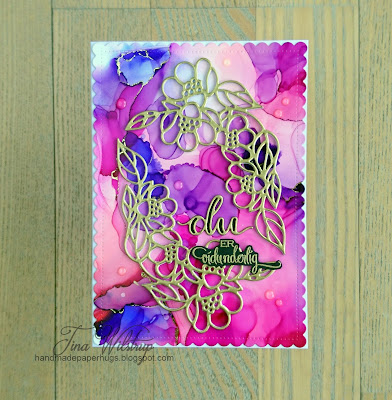
Hi there, I'm back after a family vacation with 2 birthday cards for her,  since I decided to use both negative and positive die cuts. First I used the largest My favorite things wonky stitched rectangle to cut out an alcohol ink panel I had already made. Then I used MFT Cheers and Birthday Girl word dies on the panel - I removed all the letters and was really careful to not loose the inside "bubbles" of the letters.     I carefully glued a piece of acetate to the back and glued on the loose bits as well. I hand cut a hole in a frame of white cardstock and placed the alcohol ink panel on top. Then I build up the shaker with crafting foam, used my antistatic bag and filled the tub with sequins, tiny confetti and glitter in colors of  silver, pink and purple. I then cut the MFT layered champagne glass twice. The glass itself is colored with Spun sugar Distress oxide ink and I colored on a couple of details with my Copic markers -

Baby Card

Billede
Hi there, today I've got a cute baby card for you. I thought it would be fun to add felt to this card, so the My favorite things  baby rattle was cut out in baby blue felt. For extra dimension I also  cut out 3 rattles in baby blue cardstock. I used a MFT shaker pouch and stamped the sentiment with Stazon midnight blue ink.  The sentiment is in Danish and simply means Welcome to the world. I filled the rattle shaker with iridiscent blue hearts. I stamped 2 images from the MFT Magical dragons set  and  colored  them with my copics before fuzzy cutting them. For the background I cut out a piece of white cardstock with the second largest MFT elegant rectangle die. I created a cloudy scene with Tumbled glass oxide ink and the Simon Says Stamp Clouds for days stencil. Then I dry embossed the panel with the Newton's Nook Tumbling hearts stencil. Copics used: Baby dragon: B0000, B00, BG01, B02, B93, B97 Mama dragon: B21, B23, B24, B29,

Birthday card for Sis

Billede
Today is my sisters birthday, so it had to be a special card. She loves sea otters, so I thought I'd use My favorite things Otterly love you. I also used a few images from the Mermazing set. I colored the images with my copics and fuzzy cut them out.  Copic combos are at the bottom of this post. I then cut a panel from watercolor paper to 11x21 cm ~ 4,3x8,3 inch. For the sand I used distress ink antique linen and for the ocean and sky i used Tumbled glass, Salty ocean, Marmaid Lagoon, Peacock feathers and Blueprint sketch. when dry I stamped some images from the Mermazing set using oxides Peeled paint, Twisted citron, Seedless preserves and Chipped saphire.  When it was dry I spritzed it with Sheer shimmer spritz sparkle. Sentiments are My favorite things AND Simon Says stamp Tiny words and they are white embossed on dark blue cardstock using WOW! opaque bright white embossing powder. Both images and sentiments are popped up for dimension. 

Waffle Flower rainbow glam card

Billede
When I saw the Tumble On set I knew I had to have it, since my daughter is a gymnast and jumps, spins and twirls every chance she gets. The background was made with MFT radiating rays stencil and Distress oxide ink in Tumbled glass, Shaded lilac, Spun sugar, Squeezed lemonade and Twisted citron. I added a strip of gold glitter washi on each side. I colored in 5 different images in matching Copic colors. I then fuzzy cut them out. I rarely bare matching dies, because I would rather spend the money on more stamps. I popped up the images for dimension. The sentiment is actually custom made from different  sentiments and words in the set. It is embossed with WOW! gold sparkle embossing powder. For finishing touches I added lots of sparkle to the gym suits with my Spectrum Noir clear sparkle pen and a layer of Glossy accents.  I also sprinkled the whole card with gold sequins. Thanks for stopping by and have a great day!

Birthday card for her

Billede
I struggled with this card. I made different backgrounds, cut several leaves and embossed in different colors. Put it away and came back the next day. But I'm very happy with the finished card. The background is made by ink smooshing Ranger Distress ink in  Tumbled glass. I added everal layers. The MFT Birthday Wishes die and the medium and top layers of the Altenew Fantasy Floral die are cut out of an alcohol ink background. To make it stand out more, I embossed the top layer in WOW! Hologram sparkle embossing powder. The bottom layer I cut from teal cardstock. The leaves are a mix of vellum, white cardstock and embossed with WOW! Calypso and Emerald City. I layered the leaves leaving the tips free for even more dimension. This card was entered into the Simon Says Stamp Wednesday challenge - For a special lady, and WOW! embossing monthly challenge on Facebook - favorite technique. I love layering different colors and glitters.

Happy Mother's day

Billede
This card was put together quite fast since I already  had the alcohol ink background laying around.  I always make a bunch when i  pull out my alcohol inks.  This one has a little gold foil. I started by cutting the alcohol ink panel with a  Create a Smile stamps scalloped rectangle die. I die cut the Simon Says Stamp flower cluster 10 times and layered 5 on top of each other. Top layer is covered in Hero Arts Gold embossing powder.  I then placed them in an oval on the panel. For sentiment I used a Create a Smile stamps "Du" die and a Gummiapan stamp. Sentiment means You are wonderful. For finishing touches I embellished with a few drops  Morning Dew Nuvo glitter drops. With lots of dimension this card qualifies for the Simon Says Stamp Flickr challenge Dimension, as well as their Wednesday challenge For a special lady. Enjoy your Sunday and don't forget to make a mother feel special today.

Spring/Summer Coffee Lover's Blog Hop 2019

Billede
It's that time of year again, and I made a card full of bright summer colors. It is (almost) entirely die cuts and embossing powders. I adhered double sided tape to one side of my cardstock and cut out Lil' Inker coffee word die 10 times. I eyeballed the placement and covered the background with them for a white on white look. The cup is My Favorite Things Hot Cocoa cups. I inked up the bottom of the cup with Mustard seed distress ink for an ombre look and covered it with WOW! Honeydew embossing powder. The "coffee" is embossed with Bark embossing powder, the heart with Primary Fuschia Fusion and the steam with White twinkle embossing powder, all from WOW! I cut out the coffee word 4 more times and layered them for dimension. The top layer as well as the sentiment is embossed with WOW! Primary Fushia Fusion.  I love how the embossing powder makes the elements pop,  and this will also go into the monthly challenge on Facebook.

AAA birthday card challenge

Billede
When coloring the cute jungle vibes critters from My Favorite Things I didn't have a rainbow card in mind. However, that's how it turned out. I used an emboss resist technique for the backgroung.  I stamped the musical notes background with versamark ink and covered with WOW! white pearl embossing powder.  I then used the ray of light stencil to create a rainbow using oxide inks in candied apple, spiced marmelade, wild honey, moved lawn, peacock feathers, blueprint sketch and wilted violet. To ground the critters I added a wonky stitched rectangle,  using 2 dies to create a frame. Sentiments are white heat embossed on black cardstock and the birthday word die is covered in WOW! black magic embossing powder. The black glossy layer with specs of gold and silver is just gorgeous. As a finishing touch I used my spectrum noir clear sparkle marker on the instruments. There's a new challenge blog as of monday, and since I create  lots of birthda

Swatching embossing powders

Billede
To get me startet, I thought I'd start with a tip for you. I am obsessed with WOW! embossing powders.  So many pretty colors and lots of sparkle - eeek!  While some powders are opaque (~you can't see the colors underneath), a lot of them are transluscent (~the color underneath shows through). Since you can't tell by looking at the jar which group they belong to, I swatch my powders. Takes the guessing out of it when you're choosing a powder for your project. I start by die cutting circles that will fit the lids.  I then color half of each circle with a black marker. I add embossing ink and embossing powder making sure I know which which is which. I  then heat with my WOW! dual heat heat tool - which I recommend by the way, it's super strong and fast - and add the circles to each jar.  These are not my full collection, but you can see how some cover the black marker and others don't. NB. I didn't get paid to do this post, I sim