Opslag

Viser opslag fra juni, 2019

Combining challenges

Billede
Hello! I love challenges. The way it pushes me to stretch my mind on how to stretch my supplies. And I love the challenge of combining challenges as well. That's what I did today! I combined both the sketch and photo at Fusion card and the color challenge at Color throwdown. I used an images from My favorite things New best friend stamped, colored with copics and fuzzycut.  Sentiment is from MFT Lucky dog. I masked off the panel and ink blended with Distress oxide Marigold, and then used MFT Basic shapes triangles stencil and Distress oxide Spiced marmelade. I popped up the image with foam squares and added a couple drops of Nuvo jewel drops in Orange marmelade. Copics used: Skin: E04, E11, E00, E000 Hair: E40, E42, E44, E47 Shirt: YR04, YR02, YR82 Pants: C7, C5, C3 Boots: B99, B97, B95, B93 Dog: W7, W5, W3, W1, 100, C7, RV13, B93, B91 Thanks for stopping by, and happy crafting! This card is entered into:
TE Be a mermaid

Billede
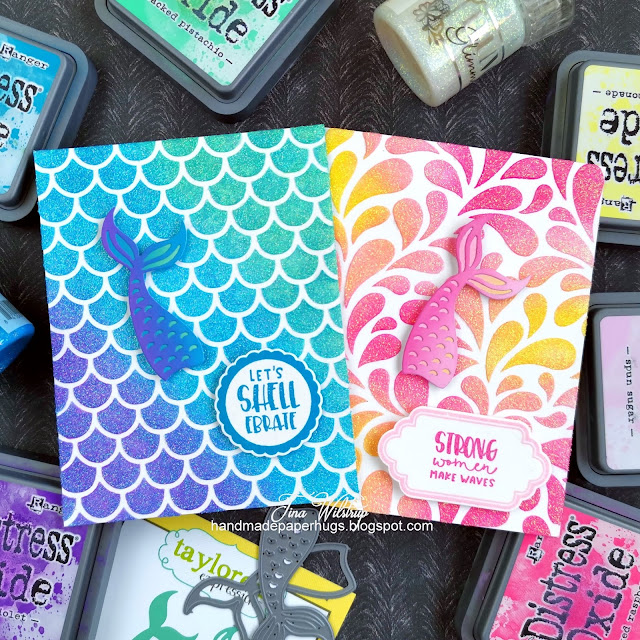
Hello! Eeeeeek! The Taylored Expressions Be a mermaid stamps and dies just arrived! I was so excited to play with these! I also got a couple of new stencils, because i LOVE! stencils! So versatile and adds so much to a card. There are so many possibilities with these new godies, but I started out with these simple yet impactful cards. For the first card I used the TE Sweet scallop stencil. I placed the stencil over watercolor cardstock, flipped them over and taped them together on the back. I wanted to use Nuvo glimmer paste in Blue topaz, but I thought I'd try ink blending the background. I used Cracked pistacio, Mermaid lagoon and Wilted violet  Distess oxide inks and I wasn't too careful blending the colors, because I honestly didn't think it would show this much. But I'm so glad it does! I smeared over the glimmer paste and set it aside to dry.  On a piece of regular cardstock I ink blended 2 areas large enough to fit the mermaid

Heat embossing a digital stamp

Billede
Hello! Did you know that you can actually heat emboss a digital stamp? Today I created this very simple and easy card doing just that. I set my embossing powder ready near the printer, fed the printer with my orchid cardstock and as soon as the image had printed the Roses Bouquet by Alex Syberia Design I sprinkled WOW! Metallic gold sparkle embossing powder over it. I forgot to use my antistatic powder, so I dapped off the excess with a small paint brush (I use it for only this). I heat set this on setting 1 on my WOW! dual speed heat tool and I started heat setting from the back of the cardstock and then finished on top. I did this to prevent too much of the glitter to fly off during heat setting. I die cut the image using the largest My favorite things Elegant rectangle and adhered it to a panel of not too sparkly gold cardstock. On the same cardstock I stamped "happy" from Simon says stamp Tiny words. Turns out it fit perfectly in the Clearl

Pinkfresh Studio Folk Hummingbird

Billede
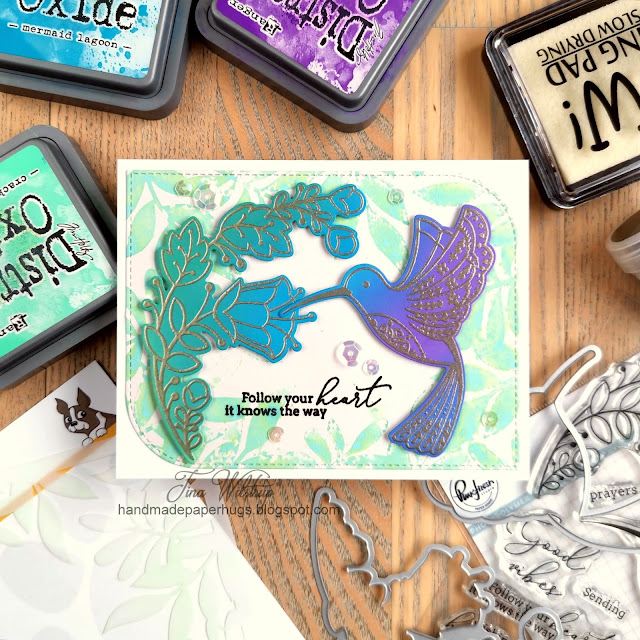
Hello! The Pinkfresh Studio Folk hummingbird arrived a short while ago and I haven't had the time to play with it. I changed that today.   I started by ink blending a panel with Lucky clover, Mermaid lagoon, Wilted violet and Blueprint sketch oxide inks. I dried the panel with my WOW! heat tool on setting 1, to ensure the embossing powder wouldn't stick everywhere. I then placed it in my Misti and placed the stamps so the colors were spread across the images. I stamped with WOW! embossing ink and embossed with WOW! Metallic platinum embossing powder.  For the background I inked up 3 sides of the Simon says stamp Leafy frame stencil with Cracked pistacio oxide ink. I then spritzed on a tiny bit of water and placed it on a panel of light grey cardstock. I made sure to press them together and I still had to do it twice in some places. I flipped the stencil over and inked up the last side and repeated for the last side of the panel. And as you can se

Strawberry shake and tropical flowers

Billede
Hi there, Confession, I don't always buy things when they're released. Other than the obvious financial reason, I find that if I wait I'll know if I REALLY need it in my life, lol 😄  So, for this card I wanted to use the new-to-me My favorite things Cool cup die. I have done alcohol ink backgrounds before, but never used my Copic refills. But to achieve the very light pink swirly background I wanted, I decided to use refills RV00 and RV02. I also have some RV06 on this, but I didn't use that part for this card. I wanted some glitter in my strawberry shake, so before the ink dried I simply added some Lawn Fawn chunky glitter. I didn't know if the glitter would stick, but it did! After it dried I cut the cup part. The whipped cream is cut from white cardstock and I decided to add sprinkles with my RV02 copic marker and I also added Spun sugar oxide ink along the edge. The straw was also cut from white cardstock and colored with Copics RV09 an

Christmas in June? why not!

Billede
Hello! Although now retired, the Clearly Besotted Santa Baby set is new to me. So I couldn't help myself coloring up another couple of images. I stamped the images, colored them with copics and fuzzy cut them. From an A2 panel I die cut the second largest My favorite things pierced star stax die. I used my T-ruler to place the star. I used a grid in my Misti to place the sentiment and stamped with Distress Candied apple. They're not the best for stamping, but I stamped 3 times to get good coverage.  I also cut the star from craft foam and popped up the panel to put the star in the background. Before placing the cut out star I colored it with Distress ink Candied apple.  I popped up the images with foam squares and placed them on the star. There, all done! How's that for a quick CAS card. Copics used: G05, G14, YG03  R39, R29, R46, R35, R20 100, C9, C7, C5, C3,  C1, C00 W5, W3, W0 B00 E04, E11, E00, E000 E47, E44, E43, E42 T

MFT sketch challenge + birthday project

Billede
Hello! I've been constructing this card in my head for a while now, and I thought it would be a perfect fit for the current sketch challenge (see down below) and birthday project (peek-a-boo). My idea was to create a space shuttle with the astronaut looking out of a porthole to reveal an extraterrestrial birthday party inside the shuttle. Admitted, I am stretching the sketch a bit, but not too far. I started by cutting the panel 4,25"x5,75". I then scored at 5½". The extra 1/4" will be attached to the back of the other panel to create the double card effect.  To create the space shuttle I used the rounded corner of the largest mod rectangle die and traced it with a pencil. I traced a circle die for the "nose" and drew lines to indicate the tiles there.  I used my copics to color the nose and shade along the pencil line and down the sides of the panel. I used 2 pierced circle dies to cut from silver cardstock for the edge of t

Cheeky Christmas card

Billede
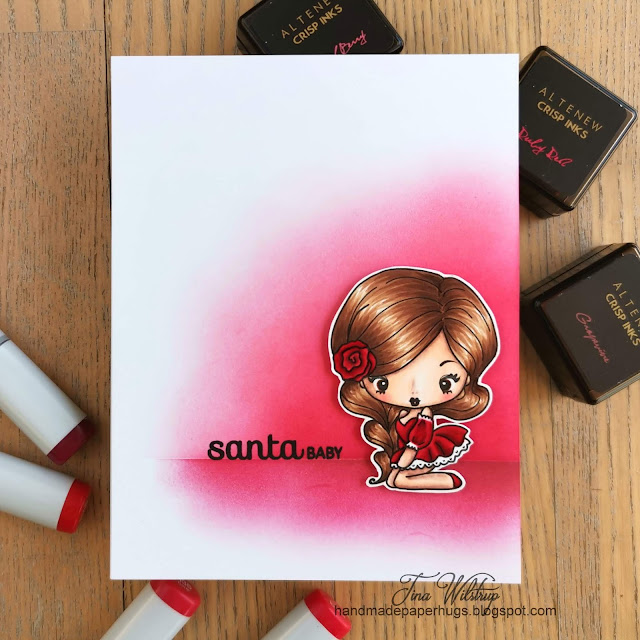
Hi there, Whenever Kathy Racoosin announces a new Daily marker challenge, I print a bunch of my digital stamps. I may not get to color them all, but I like having them printed out. Coloring is a feeling, and sometimes you don't know what you'll feel like coloring. Right?! When I printed The Greeting Farm Cheeky Love I didn't have a Christmas card in mind. But I started the coloring process and felt she needed a red dress. Even though I don't usually color a lot of red, except for Christmas. And the idea was born. Did you just start singing "Santa baby, so hurry down the chimney tonight"? I totally do! I thought I'd just create a bottom border, which I created by masking off the top of the panel and blending Altenew Ruby red and a tiny bit of Grapevine. But I didn't like the cheeky lady against all the white, so I then covered up the bottom part and blended Altenew Coral berry and Ruby red. I added the sentiment from Clearly B

Casing Jennifer McGuire

Billede
Hello, A couple of weeks ago I watched a Jennifer McGuire video where she used the Gina K wreath builder and a stencil to create a rainbow card. I loved it so much, so I had to try and create it. There was just one problem. I don't have the Gina K wreath builder. So, what's a girl to do? What's a crafter gonna do? Craft, of course! I used the grid lines on my Tonic Studios glass mat and figured out where to place my panel when turning. I then taped the My favorite things Captivating mandala stencil to the glass mat and started inking up the panel. I used Distress inks: Picked raspberry, Candied apple, Spiced marmelade, Squeezed lemonade, Twisted citron, Peacock feathers, Blueprint sketch, Wilted violet. The math part took me a bit to figure out, but I love the result! To finish the card I used a sentiment from Hello Bluebird Rainbow script and added Nuvo jewel drops in Rosewater, Orange marmelade, Limoncello, Key lime, Sea breeze and Pa

Studio Katia Flower border

Billede
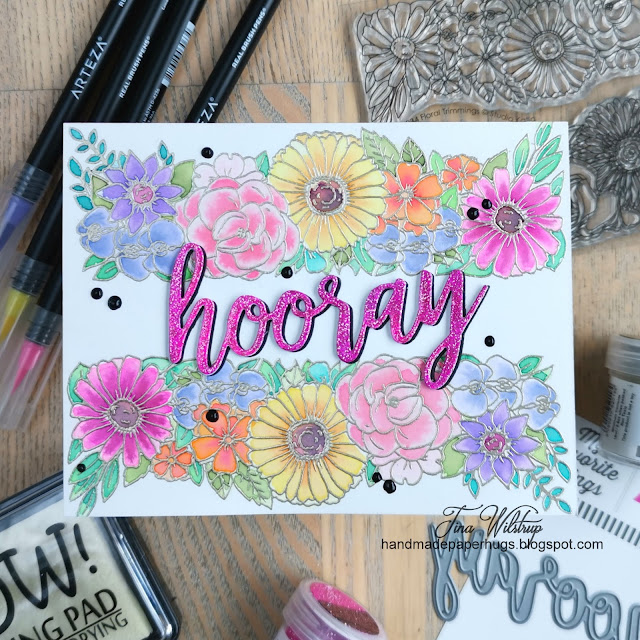
Hello! Today I've got a flower border card for you. On Bristol smooth watercolor paper I stamped one of the borders from the Studio Katia Floral trimmings with WOW! embossing ink and heatembossed it with WOW! metallic platinum embossing powder. The images were colored with my Arteza watercolor markers. I scribbled color onto a stamp block and added water before applying to paper. While it was drying I cut the My favorite things Hooray die 4 times from white cardstock, covering the top layer with WOW! Pink sorbet. I then cut it from black cardstock for shading. For final touches I added a couple of black Nuvo crystal drops. Speaking of watercolor, it's not too late to join us for the June challenge "use of watercolor" at AAA Birthday Cards - find it  HERE Thanks for stopping by, and happy crafting! This card is entered into Simon Says challenge Instagram - Summer WOW! Facebook June challenge - Glitter

Dogs dogs dogs

Billede
Hi there, You know that kind of embarrasing friend that greet strangers in public because she wants to pet their dog? Well, I'm that friend 🙈 It was passed from my Mom - haha! So of course I had to get this Stamping Bella Tiny Townie Dahpne and her doggies. The image is adorable and the sentiment - so true! i colored the image with my copics and fuzzy cut it out. The background is inkblended with Distress oxide Victorian velvet and Dusty concord. After it was completely dry I added WOW! embossing ink directly through the Newton's Nook Pawprints stencil and added Hero Arts clear sparkle embossing powder. The sentiment is from the same set and stamped with Dusty concord oxide. Thanks for stopping by, and happy crafting.

Alex Syberia Designs digital stamp

Billede
Hello, Kathy Racoosin's Daily Marker 30 Day challenge is on day 5 and I've colored up this beautiful Roses Bouquet by Alex Syberia Design. If you don't know Alex she's an amazing coloring artist, and she has just opened an Etsy shop with her own digital designs.  I printed the image on Neenah cardstock and colored it with my copics. I'm usually all for bright vibrant colors, but I really wanted to keep this soft. These colors by far are my favorite rose colors. And since Alex is all about dots and the background was too white, I fuzzy cut the image from printer paper, layed it over my colored image and splattered on diluted silver, gold and black acrylic paint. I then cut out the image with the Studio Katia Scallop frame and added it to a black backing panel. The My favorite things Birthday wishes day is cut from black cardstock 3 times and layered. Copics used: RV13, RV11, RV00 R22, R20, R01, R000 YR21, Y21, Y11, Y00 G05, G02, G00

Summer means ice cream

Billede
Hello, Summer means ice cream, right?! Well actually, that goes all year round for us. The only real "weird" pregnancy perk I had was an undeniable craving for ice cream. In my defence, my daughter was born in August and it was one of the warmest summers in Denmark to date (sadly we broke the record again last year). Needless to say, I searched for ways to cool down and ice cream helped. The funny thing is, this craving or addiction for ice cream - it wasn't mine, it was my daughter's. And it still is. She it's her fair share of ice cream 😋 I guess this is emboss resist. However, I prefer to make the background first and then emboss. So I ink smooshed a panel using Distress oxides in Twisted citron, Squeezed lemonade, Dried marigold, Abandoned coral and Festive berries. I will say, if I was going to do this again I would leave out the festive berries, bevause it's very vibrant and overpowering. But I still like how this came out. I the

MFT sketch and birthday challenge

Billede
Hello, Today I'm sharing a super easy card for the My Favorite Things sketch and birthday challenges. I started by ink smooshing a cardstock panel with Distress oxide Tumbled glass and set it aside to dry. The 2 square panels are cut from patterned paper with the largest MFT stitched pinking edge square stax. The cake is stamped with Altenew Ocean waves, candles and sentiment with Altenew Dusk and flames with Memento Dandelion and Tangelo inks. Thanks for stopping by, and happy crafting! The card is entered into  mft stamps sketch #441 mft stamps birthday challenge - make a wish/candles Unicorn Challenge - For the men/boys Crafty gals corner #193 you're the man Through the purple haze #157 guys have it Crafty calendar June challenge masculine Let's create #148 ag option you're the man Pearly sparkles challenge #41 it's a man's world Fabrika fantasy digis challenge #31 for men/boys the male room #113 cooking and

Simon says: Vacation

Billede
Hello, So I was contemplating what to create for the new Simon Says Stamp IG challenge - June's theme is summer. And then the SSS Monday challenge asked for vacation and the first thing that came to mind was: Santa. If anyone needs a break, it's him. Right?! First I cut the second largest My Favorite Things linked chain circle die 4 times. On the inside main circle I used Simon Says Stamp Waves and hills stencil, and also clouds for days stencil as well as the MFT radiating rays stencil along with Distress inks Antigue linen, Tumbled glass and Squeezed lemonade. For shading and detail I added dots with Copic markers. I stamped 3 palm trees from the MFT jungle vibes and one of the cute santas from Clearly Besotted Santa baby and colored them with my Copics. I cut the images and popped them up in the little scene. while putting this card togther I managed to turn the stenciled piece, shifting my scene. But it still looked OK so I kept it as is.  I placed

Anniversary card

Billede
Hi guys, Yesterday was our 16th wedding anniversary and I'm sharing the card I made for my husband.  To me butterflies symbolise growth, evolving, learning and so it was perfect for this card. I started by ink blending a panel with Distress oxide Blueprint sketch, Wilted violet and Picked Raspberry. I sprayed som water with my Distress sprayer and also flicked on some with my hand and dried off the excess with a paper towel.  I then stamped the Simon Says Stamp Strangeness flower stamp and sentiment from their Love set with WOW! embossing ink and covered with WOW! Opaque bright white. I decided to spray it with sparkle shimmer spritz. Because, you gotta have sparkle! The star of the show is the Birch Press Paradiso butterfly A, B and C layers. I only used the body from the C layer, and I covered the B layer in WOW! embossing powder silver sparkle.  I hope to have inspired you. Happy crafting! This card is entered into the  f

Masculine birthday card

Billede
Hey everyone, Today I'm sharing a masculine card. It seems to be something a lot of us strugle with, but since I had my oxide inks out (see post from yesterday) I ink blended one more panel using Faded jeans, Broken China and Cracked Pistacio. I just love this combo. I placed the panel in my Misti and prepped it with my antistatic powder tool before stamping the Simon Says Stamp Ornate background stamp. This is one of my all time favorite stamps and I keep going back to it. I often use my Versafine Onyx black and clear embossing powder, but for this I used Stampendous black embossing powder because it has a really gorgeous raised glossy look.  Just look at that shine! The TILLYKKE sentiment simply means congrats and is from Simple and Basic. I die cut it from black cardstock 4 times for dimension, and covered the top layer in WOW! embossing Vintage peacock glitter. TIP: The die does not come with a shadow, but i turned it upside down on a black

Simon says masculine

Billede
Hi all,  I needed a Father's day card for my Dad and I was just lost for ideas. So I went for a very simple card, or so I thought because the layout still had me thinking way too much. But I like the result. I started by inkblending a panel with Oxide inks in Twisted citron, Peacock feathers and Blueprint sketch. From black cardstock I die cut the Pinkfresh Studio Geo Floral cover die and placed it over the inkblended panel. Also from black cardstock I die the second smallest My favorite things linked chain circle die. I left in all the pieces bakced it with crafting foam. I embossed the sentiment with WOW! Totally teal embossing glitter. The big block letters are MFT and the sentiment simply means: Dad, you're super! Although it's a masculine card it felt a little bare, so I added a couple of Lucy Abrams sequins from the Snowfall mix. They have a very light tint of icy blue which was just right for this card. The card is entered into S

DT announcement

Billede
Goodmorning all! Today is the day I can finally reveal that I am joining  the design team at AAA Birthday Card Challenges - YAY! I'm honored to work alongside a group of very talented ladies  and so super excited to begin this adventure. I'm still happy dancing! Thank you so much for this opportunity, Jane!  I couldn't wait to get started, so I created a card for  Game #2 - use of watercolors I used Altenew Wallpaper art stamp set and I used the coordinating  stencil set to help mask off the images. Since I was going to watercolor  I stamped with Gina K amalgam ink. I first created a wash with Distress Oxide inks Spun suger, Picked raspberry and Seedless preserves. After drying the panel with my heat tool I added shadows to the images using water a couple of watercolor markers. The "happy" is from another Altenew set - Painted poppies - and "birthday wishes" is from Simon Says Stamp Tiny words. This is a very simple card for me, but I

Father's day

Billede
Hi everyone! Father's day is always on June 5th here in Denmark,  and I made this card for my daughter to give to her daddy. I used the new to me, but now retired, My favorite things Monster Sized stamps.  I colored them to coordinate with the pink, green and teal embossing glitters I wanted to use. After coloring I fuzzycut the images. For my background I used the Newton's Nook Tumbling hearts stencil. I wanted to create the look of a sparkling galaxy so I first applied a thick layer of texture paste. After removing the stencil I sprinkled WOW! embossing glitters in Midnight dream and Calypso along the edge of the panel and Spring breeze, Sorbet, Pink Sorbet and Purple glitz in rainbow order on the rest of the panel.  How to: You want to make sure you  turn your paper over  (rather than letting the excess slide of) in between every color.  When done let the panel dry completely before you heat emboss.  I really love the dimension this t